|
Basic
Silver Care Advice ©
1. To avoid
damaging your silver, clean it only when you don't feel rushed. I've
restored many a candelabrum arm that was broken off in haste. Also,
be aware that if you're wearing a ring, that ring will scratch when
in contact with the piece you're working on.
2. If you
are looking for someone to clean your silver, choose an individual
with experience. Ask about what methods and polishes they will use.
If you require assistance, please contact
me.
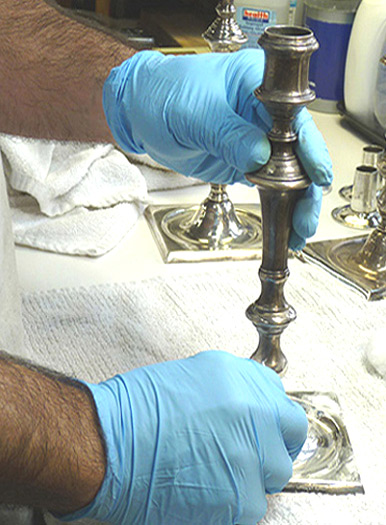
3. Always
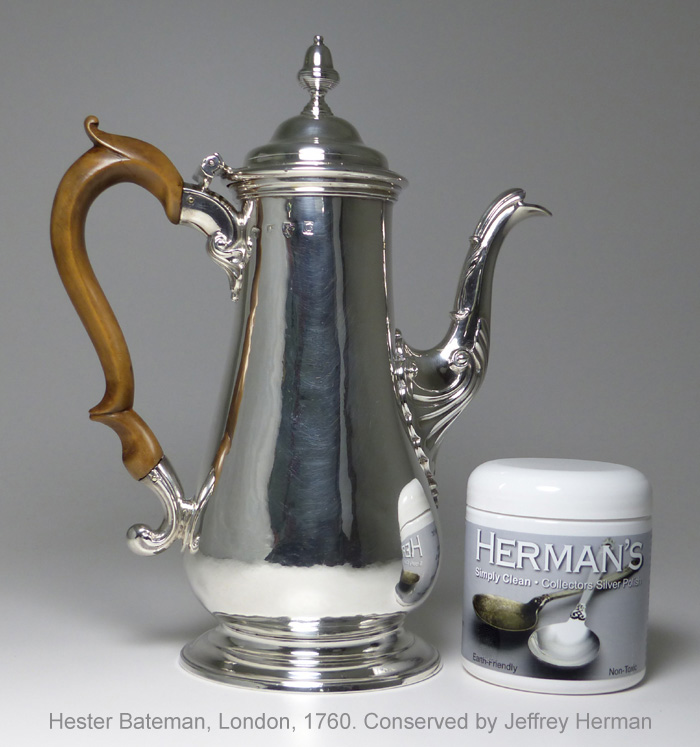
polish/clean your silver on a sturdy work surface covered by a cotton
towel as illustrated in this
image. If the work surface is made of wood or other porous material,
lay a piece of plastic under the towel.
4. Always remove
dried polish and grime FIRST! You may find that this is all
that's required in bringing back the luster to your silver. Should it
require polishing, you'll find it much easier when removing the
tarnish, even with the most gentle
polishes.
5. Keep
your polish container closed when not in use, and don’t use
polishes that have dried-up. In order to keep your water-based polish
staying creamy if stored for an extended period, add a little
distilled water (not tap water).
6. NEVER use chemical dips
(see section on Chemical Dips).
7. Before using your
polish, please refer to the Silver
Polish Abrasion Ratings page as you may be using a polish that
is much too abrasive.
8. Use
untreated cotton gloves or form-fitting nitrile gloves when handling
silver – finger prints contribute to tarnishing.
9. Always
try to support a teapot or coffeepot by the bottom when holding it by
the handle.
10. If your
silver is tarnished to an extent that it requires a commercial
polish, use only polishes made specifically for silver. (See section
on Cleaning Silver.)
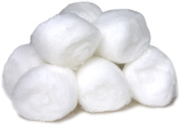
11.
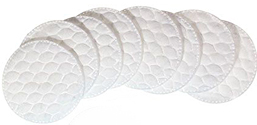
Don't be stingy with cotton balls or makeup pads (Updated
12.16.2020: I prefer Equate's
Premium Woven Exfoliating Rounds as they're much stronger than
regular pads.) and constantly rotate them to expose clean material.
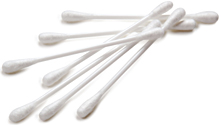
12. To
remove tarnish in tight spaces, use a cotton swab or wrap a wooden
popsicle stick or skewer with a cotton makeup pad or cotton ball. You
can also use a flattened cotton swabs to clean between fork tines.
13.
Cleaning silver in a dishwasher is not advised, as the heat and harsh
detergents will eventually whiten the silver, causing it to require
professional refinishing. In addition, dishwashers can cause blades
to explode out of hollow-handled knives. (See section on Silver
& Dishwashers.)
14.
Silver flatware used on a daily basis will require little or no
polishing. Hand wash with a non-lemon-scented phosphate-free
detergent and dry them immediately to avoid spotting.
15.
When storing your flatware, rotate the pieces so they
will wear uniformly.
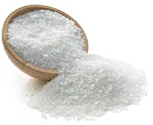
16.
Salt is extremely corrosive to silver; always empty vessels and wash
them when not used on a regular basis. (See section on Salt
Encrustation.)
17.
When cleaning or inserting a candle into a candelabrum, support the
arms from underneath to avoid distortion or possible breakage.
18.
Do not cut food on a solid silver or silver-plated tray. Cutting
lines (and possibly linear dents) will decrease the object's value.
Plus, on a plated piece, you will very easily cut through the
plating, exposing the base metal. Instead, cut the meat on a cutting
board and place it on the tray.
19.
If your objects contain ivory or wood, apply Staples Crystal Clear
Wax (not the stationery store) on those surfaces. Go here
for instructions.
20.
Hold a piece of white paper or plastic up to the piece you're
polishing as the reflection will reveal if there is additional
tarnish that needs to be removed. Just be sure you are not mistaking
firestain for tarnish. (Read about firestain here.)
21.
Silver is best stored in treated flannel bags which draw away the
sulfur from the silver it's protecting. Alternatively, you can wrap
your silver in acid-free tissue or paper then placed in a Ziploc or
other polyethylene bag with an anti-tarnish strip. (Go here
for complete storage methods.) Keep the silver in a dry, safe area
and use silica gel to help absorb dampness.
Cutlery should be wrapped individually and placed side by side,
rather than piled up.
22. IMPORTANT!
When removing tarnish, always invest more time using a gentle silver
polish over getting quicker results with a more abrasive silver
polish. Ninety-nine percent (99%) of tarnish removed from silver I
work on is accomplished with either Blitz
Silver Shine Polish or Herman's
Simply Clean Collectors Silver Polish.
23.
If you see any exposed copper, lead, or white metal inside a piece of
silver you drink from or flatware you eat off of, don't use it; the
exposed area or entire piece will require re-plating. Read more here.
If
you're ever in doubt about the the abrasiveness of a silver polish, visit Silver
Polish Abrasion Ratings.
Additional
Advice for Flood Victims

24.
If your silver was involved in a flood, gently shake any piece
that might have hollow spaces (e.g., sockets on teapots and
coffeepots that contain ivory heat insulators or wooden handles,
hollow handles on some flatware, hollow rims, and candlestick cups
with double walls). If you can hear water swishing within these
areas, contact a qualified restorer (for referrals, ask a museum with
a large silver collection or an antique silver dealer).
25.
If the object has no hollow areas, rinse it well to remove any dirt.
When the piece feels clean to the touch, wash it with a cellulose
sponge using a non-lemon-scented, phosphate-free detergent and warm
water. You can also use hand sanitizer or
70% isopropyl alcohol and remove any residue with the Better
Life Natural Glass Cleaner. Dry the piece immediately
with a soft cotton towel and store in a Ziploc bag with an
anti-tarnish strip and silica gel.
26.
Rust may have started to develop on carbon steel knife blades of
older pieces or on the worn edges of knife blades coated with silver.
Do not use steel wool or Navel Jelly to remove the rust; rather,
contact a silver restoration specialist as the blades will have to be
gently cleaned then re-plated or replaced with stainless steel.
When
in doubt, STOP! Contact
me before
doing irreparable harm to your silver.
Cleaning
and Polishing Silver ©
Silver, when properly maintained,
will yield generations of enjoyment. The following cleaning
instructions have been tried and proven in my silver restoration &
conservation studio. They are suited for gold as well as silver.
Silver-plated and gold-plated items should be treated very gingerly,
as too-vigorous cleaning can remove the plating and expose the base metal.
Tarnish is
caused by contact with sulfur compounds, mainly hydrogen sulfide in
the air. Relative humidity (RH) also affects the tarnishing rate.
Other common culprits are:

Foods (partial list):
eggs, mayonnaise, onions, sour cream, mustard, garlic, poultry, fish,
cabbage, bananas, coffee, chocolate, nuts
Water: sulfur-rich well
water, seawater, hot tubs, swimming pools
Fossil Fuels: natural gas,
coal, oil
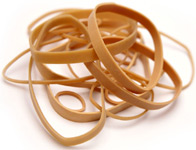
Rubber: bands, latex
gloves, carpet padding, bicycle tires, o-rings, stoppers
Paint: check with the manufacturer
Light: the sun, light
bulbs that off-gas
Smoke: tobacco, exhaust,
fireplaces, candles
Fabrics and Leather: most
are treated and tanned with sulfur-bearing compounds, wool
Cosmetics: lotions, perfumes
Clays: (e.g. certain
modelling clays)
Glues: (protein-based)
Other: sewer gases
Sulfur (elemental sulfur):
some adhesives, cement, grout
Relative humidity (RH) also
affects the tarnishing rate. For a given concentration of hydrogen
sulfide, silver tarnishes faster as the RH climbs. As a result,
silver is best stored in dry conditions (below 50% RH).Also, oily
salts from fingers can cause corrosion patterns that may have to be
professionally removed.
BEFORE cleaning or
polishing your silver: If your objects contain wood, ivory, etc.,
apply Staples Crystal Clear Wax. This will
seal these components from rotting and drying out.
Gently wash and dry your silver
immediately after use. While washing, do not allow silver to come
into contact with a metal sink, as that can cause scratching. (Use a
plastic dishpan or line the sink with a towel.) Use a
non-lemon-scented phosphate-free detergent and, to avoid water spots,
towel-dry using a soft cotton dish towel or Selvyt cloth. Silver that
is used frequently and washed in this manner will require infrequent
tarnish removal. When storing your flatware, rotate the pieces so
they will wear uniformly.
Occasionally cleaning an object
is preferred to waiting until heavy tarnish forms and polishes have
to be employed. (All polishes have some degree of abrasion.) If
tarnish has started you'll recognize it in its earliest stage if you
hold a piece of white paper next to the object. You can sometimes
remove this light tarnish in its very early stages by cleaning, not
polishing. If tarnish has started to form, you will see a very light
yellowish tint on the silver.
Try removing this light tarnish
with either diluted citrus-free
Dawn Dishwashing Liquid, 100% plant-based Better Life Dish
Soap on a cellulose sponge, a 100% plant-based glass cleaner like
Better Life Natural Glass Cleaner, or aloe-free hand sanitizer
on a cotton ball, makeup pad, or cotton towel. If the hand sanitizer
leaves a residue, rinse it off with warm water or remove it with a
moistened cotton towel, then dry immediately. If water doesn't work,
use the dish soap or glass cleaner. Try this technique first as it
will remove absolutely no metal. Try using the glass cleaner on your
jewelry and other metal objects as well.
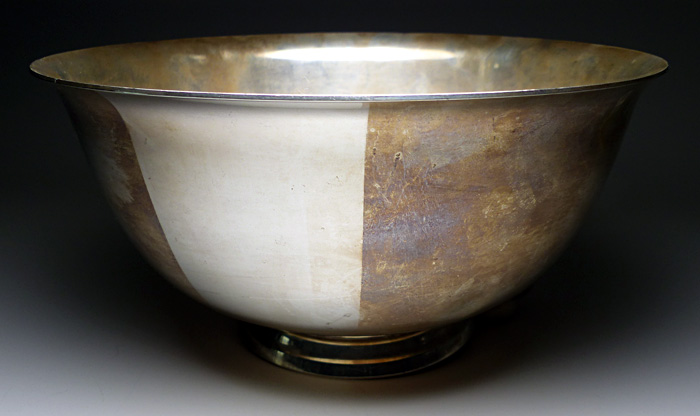
Below: The
left side of this sterling Revere bowl was cleaned with aloe-free
hand sanitizer.
Solid gold objects may
occasionally need grime and body oils removed. Objects that have
tarnish are normally those where the gold has worn away, exposing the
base metal. In both cases, use the same methods mentioned above for silver.
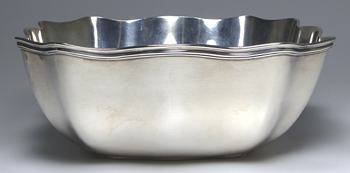
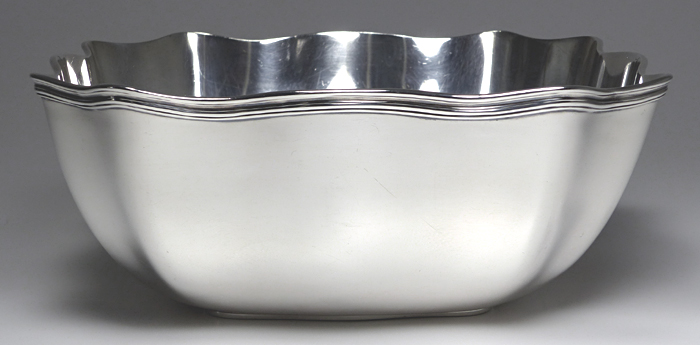
Below: Tiffany sterling bowl that
was cleaned with Better Life Natural Glass Cleaner (right). If
tarnish remains use one of the Least
Abrasive Silver Polishes.
Below: After using Herman's
Simply Clean Collectors Silver Polish.
Below:
Notice the difference in this grimy handle after using Better
Life Natural Glass Cleaner and a light wiping with a horsehair brush.
This is another instance where cleaning is preferred to polishing.
Also, it would have taken added time to remove the grime with silver
polish, especially in the low-lying areas.
For another
example of what cleaning will accomplish as opposed to polishing,
click here.
Check out this video
for some basic polishing instructions using hand sanitizer and Blitz
Silver Shine Polish.
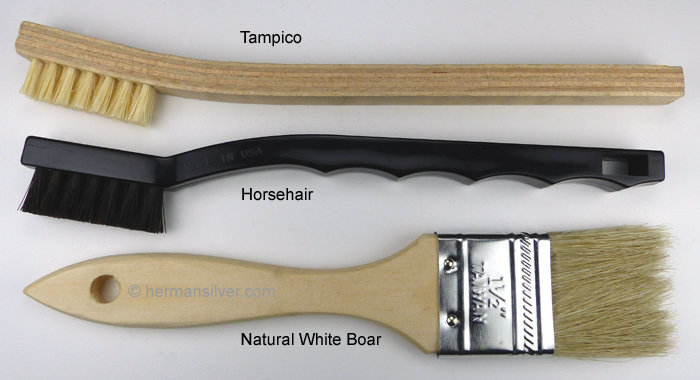
Always
remove dried polish and grime from crevices and ornament on
previously polished pieces before repolishing. Run warm (not hot)
water over the dried polish and use a tampico (made from fibers of
the agave plant), horsehair, or natural white boar bristle brush
(found in most hardware stores) and lightly "tap" out the
polish. (Wrap the boar ferrule with electrical tape to avoid
scratching the piece you're working on.) Shorten the bristles if you
need added stiffness (see below). This will lift the polish away from
the object with no or minimal abrasion. Never use a dry brush when
removing dry polish as it will create scratches. If there are porous
elements on your piece (wood, ivory, other of pearl, etc.), wet a
cotton swab and apply the water to the polish. Allow the polish to
soften then lift it out by tapping with a wet brush. A wet toothpick
will get into the smallest areas.
This horsehair flux brush will
get into tight areas and they're available in many sizes. (Wrap the
handle with electrical tape to avoid scratching the piece you're
working on.).

If your piece is more tarnished,
use one of the commercial silver cleaners, some of which provide
tarnish protection. Use the least abrasive product possible. Polishes
that are meant to be washed off are less abrasive because they use a
liquid to suspend the polishing ingredients.
The least abrasive of the
commercial cleaners are Blitz Silver Care Polish (preferred
for its combination of tarnish protection and its ease of use:
apply/rinse/buff and apply/let dry/buff); Herman's Simply Clean
Collectors Silver Polish (preferred for maintaining the object's
original finish & extremely mild abrasiveness);
3M's Tarni-Shield Silver Polish, or Twinkle Silver Polish. These are
all non-toxic. If you are thinking of using polishes other than what
I just listed, please please refer to Silver
Polish Abrasion Ratings.
If, after cleaning your silver
(not silverplate) piece, a purplish stain remains, do not mistake
this stain for tarnish! Attempting to remove it will only damage
your prized piece. This is firestain,
which is oxidized copper, and can be found on many pre-colonial
through early twentieth century pieces. It is not generally seen on
pieces that have been produced by the large American silver companies
after the early 1900s, but many one-person silversmithing shops still
use this technique. I will not get into the technicalities of
firestain here, but the stain is usually obscured with fine silver
either by silver plating the object or through a process called
depletion. The firestain under this fine silver layer, which may be a
few thousandths of an inch thick, may not show up until after many
years of polishing. Consult with a restoration silversmith if this
happens to one of your pieces.
Use the following method
if you are polishing near unwaxed or cracked components (wood, ivory,
mother of pearl, felt, etc.) or with no available water.
Wooden handles & finials,
ivory insulators, and felt used on the bottoms of candlesticks and
compotes can become damaged when introduced to excess moisture. For
objects with such components, use Blitz Silver Shine
Polish. Use this polish also for hollow areas that will not
dry (beaded rims, handle sockets with minute holes, etc.), or if
there is no source of water. Use a large cotton ball, cotton makeup
pad, or cotton swab with the smallest amount of polish necessary and
rotate the ball or pad regularly to expose unused surfaces. (I prefer
Target's exfoliating cotton rounds because they're well made and hold
together longer than regular makeup pads.) Silver polish combined
with the silver sulfide (tarnish) will quickly flatten and clog the
fibers which will make the applicator less efficient. Rub the object
in a straight, back-and-forth manner so as to maintain a uniform
appearance. Avoid rubbing in a circular motion. Let the polish dry
and remove it with a Selvyt cloth or cotton dish towel. Selvyt is a
lint-free, untreated, 100% cotton wiping cloth with a soft finish
which is also excellent for highlighting ornament with no polish applied.
Tip: If
you're worried about getting porous attachments wet, try removing
the polish you just used with a moist cellulose sponge instead of
rinsing that area. Here is a valuable resource for the care and
handling of ivory: https://www.si.edu/mci/english/learn_more/taking_care/ivory.html.
Use the following method
if you are polishing an object without porous components
or components that have been sealed with Staples
Crystal Clear Wax.
Rinse the object first to remove
any pollution that may have settled on the object. These
contaminants, which may be more abrasive than the polish you will be
using, can actually scratch the silver if rubbed into the surface.
Use a cellulose sponge (not Scotch-Brite plastic sponges or the soft
plastic sponges that come with some silver polishes) and apply Blitz
Silver Shine Polish or Herman's Simply Clean. If you feel it
necessary to protect your hands from moisture, use nitrile gloves
which contain no ingredients that tarnish silver. Do not use latex
gloves! Rub the object in a straight, back-and-forth manner so as to
maintain a uniform appearance. Avoid rubbing in a circular motion.
Rotate the sponge regularly to expose unused surfaces then rinse. If
the tarnish is particularly heavy, a cotton ball or cotton makeup pad
will speed the removal process. Flattened cotton swab heads with very
little silver polish applied are excellent for cleaning between
fork tines. Silver polish can also be used on unflattened cotton
swabs to remove tarnish from inside coffeepot spouts and the like.
Below: I'm wearing nitrile gloves
and a cotton ball with Earth Friendly Silver Polish to remove tarnish
from this Paul Revere Beaker. (Earth
Friendly was discontinued which is why I developed Herman's
Simply Clean Collectors Silver Polish.)

Dried polish can be removed by
patting the area with a warm wet cotton ball or a wet horsehair or
natural boar bristle brush. Rinse the object with warm water or wipe
with a moist cellulose sponge, ringing out after every wipe, then dry
with a Selvyt cloth or cotton dish towel immediately to avoid
spotting. I advise using heavyweight
cotton inspection gloves to avoid finger prints when cleaning and
storing your freshly cleaned objects. I recommend washing them first
to remove any processing chemicals.
How
to Polish Chain Mail (Mesh) ©
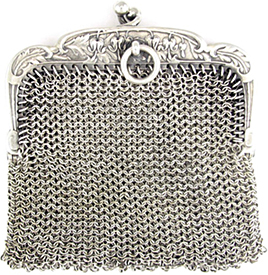
Chain mail (also known as
chainmail or chain maille) is one of those items that can perplex
most collectors when it comes to polishing. Some will reach for a
chemical dip because it removes tarnish quickly, but will end up
results like these. Others will use a paste
polish that may end up drying within the mesh after buffing. The
following instructions are for polishing chain mail without fabric
attachments. Chain mail with fabric attachments requires assistance
from a conservator.
Place a cotton bar mop (a kitchen
towel with a low pile), on your kitchen counter. If the chain mail is
very dirty, run it under warm water and dry it first. If it has dried
polish, run it under warm water and tap out the polish with one
of these brushes, dry it, then place the object on the towel.
If there is very light tarnish,
try using a 100% plant-based glass cleaner like Better Life Natural
Glass Cleaner (my personal favorite), or aloe-free hand sanitizer. If
the hand sanitizer leaves a residue, rinse it off with warm water or
remove it with a moistened cotton towel, then dry immediately. If
water doesn't work, use the glass cleaner then gently pat dry with a
clean bar mop. Try this technique first, as it will remove absolutely
no metal.
If this technique doesn't remove
the tarnish, use Blitz Silver Shine Polish on a cotton makeup
pad or bar mop, constantly exposing clean areas to clean with.
Remove the polish with warm water (again, try the hand sprayer) then
wipe the object with a bar mop until you see no polish left on the
towel. The Blitz will leave a non-toxic, invisible tarnish protectant.
How
to Polish Filigree ©
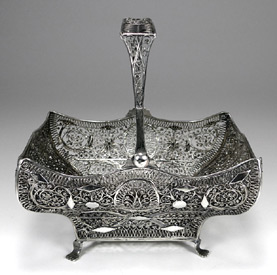
Use the same instructions as polishing
chain mail. If the filigree has heavy tarnish on its edges, try
using a piece of smooth leather coated with a mild silver polish.
Rinse under warm water and pat-dry immediately or use compressed air
to blow-out any remaining moisture. You can see before and after
images of the above basket here.
Caring
for Mixed Metal Objects ©
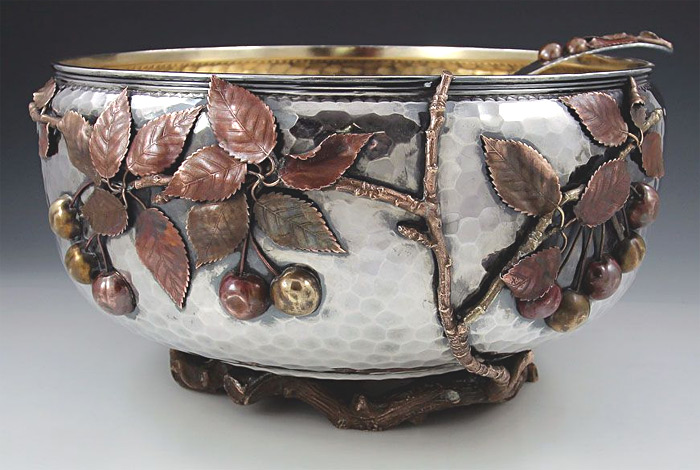
Mixed metal objects, like the
Gorham bowl above with beautifully aged coloring and perfectly
polished silver, require more thought prior to cleaning and
polishing. Many of these pieces may have attachments made of copper,
brass, gold, and combinations of metals. Some have patinated copper
with applied silver or gold, or cast iron with silver applique. I
have seen many objects that have been totally polished without taking
into consideration of possible patina damage. This had led to the
removal of complex applied patinas to the applique which should never
have been polished. Some of these patinas can never be duplicated as
they may have changed with age or the formulas were never put in
writing. Remember, silversmithing, in addition to a craft, is an art.
And as in any work of art, sensitivity to the surface is critical. To
avoid damaging the patina on this type of object, please contact
me for assistance with its care.
Toothpaste ©
Toothpaste should NEVER be used
as a silver polish. Some toothpastes contain baking soda or other
ingredients which are much too abrasive; even trace amounts can cause
serious damage. Use polishes that are specifically
formulated to remove tarnish from silver.
Chemical
Dips ©
Chemical dips, such as Tarn-X,
work by dissolving the tarnish on an object at an accelerated rate They
work by dissolving the tarnish (and silver!) on an object at an
accelerated rate.
Chemical dips will
quickly remove factory-applied patinas (if left in the solution for
more than a few seconds) or gradually (if dipped quickly each time
the object requires cleaning). You'll notice a soft white surface
develop over time.
Chemical dips will
quickly strip the shine from silver, leaving a dull, lifeless appearance.
Chemical dips will
cause pitting of the object's surface. These surface defects will act
like a sponge and more readily absorb tarnish-producing gases and
moisture. The object will eventually require professional polishing
and possibly repatination to restore the original finish.
Chemical dips are
made up of acidified thiourea (a strongly
suspected carcinogen).
Acids are corrosive and will damage silver, niello, bronze,
stainless steel knife blades, and organic materials such as wood and ivory.
See the results from chemical
dips here.
Aluminum
Foil Technique ©
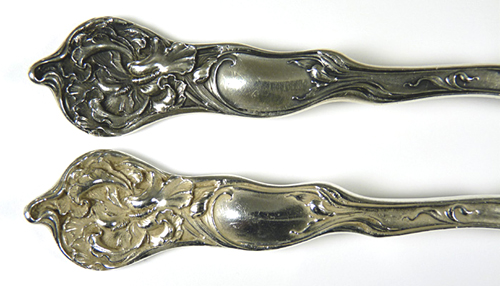
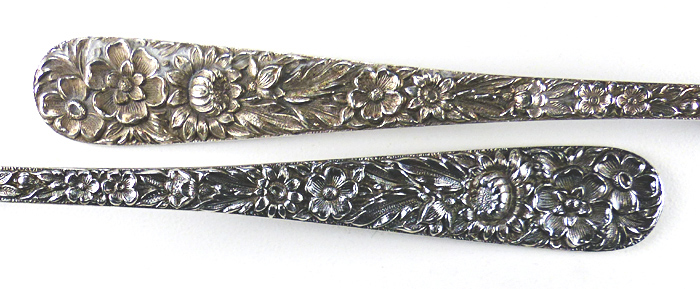
Above: The top sterling fork was
left unpolished. The lower fork is another piece from the same lot
that was that was subjected to the aluminum foil technique for only
two minutes, resulting in stripped factory-applied patina. The
whiteness is the result from copper that was etched (as seen under
10X magnification) from the sterling, leaving fine silver behind. Here's
another shocking example.
This process, known as
electrochemical (galvanic) reduction, uses aluminum foil (or an
aluminum plate); a ceramic or other non-heat-sensitive bowl or pan;
sodium carbonate (washing soda) or sodium bicarbonate (baking soda);
and boiling water. The aluminum is placed in the bottom of the bowl
with either the washing soda or baking soda distributed on the
aluminum surface. Boiling water is then poured over the powder and
the sterling, coin silver, .800 (or other silver-copper alloy) object
is immersed. When the object comes into contact with the
aluminum in the solution, the tarnish (silver sulfide) is converted
back to silver. And as with silver dips,
factory-applied patinas will be dissolved. These pieces will
eventually require repatinating. Case in point: This action will
happen to both tarnished and polished silver. (Note: washing soda
etches more severely than baking soda.)
Pieces cleaned may tarnish more
quickly than silver that has been polished with a paste or liquid,
for the object's rough surface will act like a sponge and more
readily absorb tarnish-producing gases and moisture. This same
solution can also seep into hollow areas such as coffeepot and teapot
handle sockets, unsoldered spun beads around the tops and bottoms of
some holloware, and weighted pieces with minute holes that developed
from over polishing. Another not-so-obvious problem is scratching of
the object when dragged over the aluminum. For all these reasons this
tarnish removal technique is not recommended.
Coffee
& Tea Stains ©
Place the pot in the sink with a
cotton towel underneath and fill the pot with warm water. Drop in one
five-minute denture cleaning tablet (about five cents each) per two
cups of water. Let stand for ten minutes. If it looks like the pot
may overflow because of the effervescence, pour out some liquid
through the spout (don't allow the liquid to run down the outside of
the pot). When the ten minutes is up, empty the pot through the spout
then rinse with warm water. You may find that the effervescing action
of the tablets may remove only the grime and not the stains. Use a
moist cellulose sponge and non-lemon-scented phosphate-free detergent
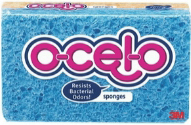
to remove any remaining grime, then rinse with warm water. If you
need more scrubbing power, use the natural fibers of 3M's
Scotch-Brite Greener Clean Sponge which
are more gentle than their Scotch-Brite Non-Scratch Scrub Sponge. If
the pot opening isn't big enough to fit your hand, make a swab by
wrapping the sponge or pad on the end of a wooden dowel and secure
the upper end with electrical tape.
If stains remain, moisten the
sponge (not the scrub side) and apply a liberal amount of Wright's
Silver Cream, then wipe away the stain and rinse the pot with warm
water. Wright's is an excellent cleaner for this task because it's
much less abrasive than commercial cleaners that are not meant
specifically for silver. Don't use powdered abrasive cleaners as they
will impart fine scratches which will attract more dirt. Don't use
steel wool (too abrasive and rust may result on the bottom),
Scotch-Brite abrasive pads or dips (too toxic – see section on Chemical
Dips). A cotton swab with a small amount of Wright's will remove
stains within the spout opening. Fill the pot with warm water and
rinse out any polish that may remain in the spout.
Cleaning
Objects With Small Openings ©
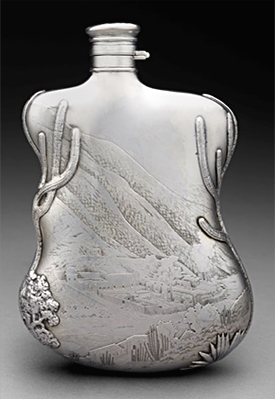
Objects like flasks and vessels
with narrow necks can be difficult to clean. Try this: Use a funnel
(if required) and fill the piece with hot water up to the neck and
let stand with the top on for 15 minutes. (Remember, silver transfers
heat quickly, so use a pot holder or oven mitt.) This will help
soften and loosen the residue. Next, pour out the water and fill
about 1/3 of the vessel with lemon juice and some yellow
samp. This dried, crushed corn will help scrape away the
residue. Close the top and shake vigorously for about 30 seconds.
Empty the contents into a container then rinse with warm water.
Inspect to see if there is any remaining residue. If there is, return
the mixture and shake again. Do this until the interior is clean,
then rinse twice with warm water and turn the object upside down to
drain. (Make sure to wipe the outside of the piece so it doesn't
leave water spots.) You can always contact me
should you have questions.
Salt
Encrustation ©
Those crusty encrustation marks
on and in your salt shaker, open salt, or other vessel can be a real
annoyance. Encrustation is different from tarnish in the way it
feels. Run your finger over the area and you'll feel a crusty mass.
This cannot be removed with silver polish. One way to avoid this
problem from the very start is to remove the salt after a dinner
party and thoroughly wash it; this way the salt doesn't have time to
do its damage. Heavily gold plating the interior is the only other
way to preserve the finish because gold is impervious to the effects
of salt. It is still wise to clean out a shaker at least twice a year
and inspect the plate to make sure it has not been abraded by the salt.
There is a simple way to remove
the encrustation yourself. The method described can be used on any solid
silver object that has this problem. Do this in a
well-ventilated area and with nitrile gloves since you will be using
household ammonia. If you have a few spots of encrustation, place
a cotton swab or cotton ball with household ammonia on the spot. Let
it sit for ten minutes, then rinse the entire piece thoroughly with
warm water and inspect the surface. If the black or green spots
remain, repeat the instructions above. * To remove the ammonia smell
from the silver, neutralize the piece in white vinegar, then rinse
under warm water. If the object is covered with encrustation –
such as a salt shaker which you cannot remove the top – place it
in a container for 10 minutes with enough ammonia to cover the piece.
If the encrustation has not dissolved after a third application or
soaking, have the object professionally conserved. If you are able to
remove it successfully, you'll probably notice a slight graying of
the silver. If this occurs, start
by using the one of the least
abrasive silver polishes to
bring back the object's luster. When restoring the
finish to a piece of silver, always invest more time using a gentle
silver polish over getting quicker results with a more abrasive
silver polish.
Should you have questions, please contact
me.
Removing
Wax From Candle Holders ©
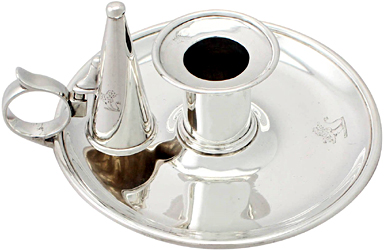
Do you become
frustrated when trying to remove wax from your candle holders? Do you
go pawing into your flatware drawer to find just the right size knife
to dig out the wax which produces scratches and possible dents in the
bottom of the cup? Do you run the piece under warm water, only to
create a big mess? Well, here are some simple, non-invasive techniques.
This
method can be used for
lacquered candle holders...
Put the piece in
your freezer. Upon removing, use your fingernail or wooden popsicle
stick or skewer (not a knife) to delicately chip off the wax. If
residue remains, remove it with grain alcohol or orange
essential oil (wear nitrile gloves if you have a skin
sensitivity) using a paper towel, cotton ball, or makeup pad. I
like Better Life Natural Glass Cleaner (which has a neutral pH) to
remove any signs of the oil. Do not use a hair dryer
or heat gun as it may blister the lacquer!
This method and
the one above can be used for weighted and non-weighted candle
holders without lacquer...
Use your hair
dryer (but not a heat gun) to gently warm the candle cup or other
area coated with wax. Be careful not to get the object too hot, for
if the candle holder is filled with pitch (a low-melting cement), it
will melt. Lightly touch the area with your fingertip to make sure
it's not too hot; then lightly wipe off the wax with a soft paper
towel, cotton ball, or makeup pad. When cleaning out a candle cup on
a candelabra, support the cup with your hand to prevent bending the
arm. If the opening is too small for your finger, gently stuff the
paper towel into the cup and twist. If there is a large build-up of
wax, square off the end of a popsicle stick and remove the wax as
it's warmed by the hair dryer. Cotton swabs also work very well,
especially on Hanukkah lamps with very small candle cups. Use as much
fresh paper towel or as many cotton swabs as needed; otherwise, you
will continually reapply the wax you are removing.
Use dripless
candles whenever possible and remove any wax residue from candle
holders after each use. Using these techniques will greatly reduce
maintenance time.
Note: Products like
acetone, Goo Gone, Krud Cutter, Goof Off, and WD-40 will remove wax
residue more quickly, but are less environmentally-friendly. Should
you decide to use these products, make sure to wear nitrile gloves
and perform the task in a well-ventilated area. Always feel free to contact
me should you have questions. Do not use acetone or Goof Off
on lacquered surfaces!
Removing
Labels ©
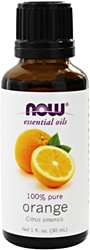
If you just purchased a metal
object with a label that won't peel off cleanly, buy some inexpensive
100% orange essential oil. If you have skin sensitivity, wear nitrile
gloves for this procedure. Apply enough orange oil to cover the
entire label; you can apply it directly to the label or use a cotton
ball or makeup pad. Wait five minutes and the label should come off
easily. If adhesive residue remains, wipe it away with additional
oil, wipe the piece with a soft cloth, and then use glass cleaner to
remove any remaining oil. (I like Better Life Glass Cleaner because
it has a neutral pH.) If a discolored spot remains on the silver
where the adhesive had been, remove it with a low-abrasive polish
such as Blitz Silver Shine Polish or Herman's Simply Clean.
Orange oil has additional uses
around the house and shop. I put a few drops in the vacuum cleaner
bag to give the house a nice citrusy scent. And I recently found that
it removes sticky sap from my car without damaging the paint! If this
product doesn't do the trick, try Goof Off, but be aware that it
should only be used in a well-ventilated area while wearing
heavy-weight nitrile gloves. It can also remove dried epoxy.
Silver
& Dishwashers ©
KEEP SILVER OUT OF THE DISHWASHER!
It's that simple. There are four major reasons for keeping your
prized sterling and silverplate out of the "chamber of doom:"
(1) Any factory-applied patina
(the blackening in recessed areas) will eventually be removed.
(2) The detergents agressive
chemicals combined with the washer's high cleaning temperature will
eventually turn it grey or white, with a dull, non-reflective surface.
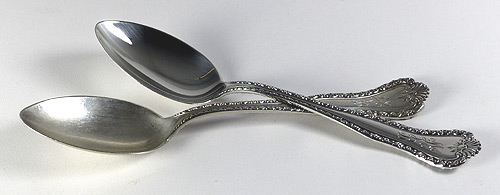
Above: Before and after polishing
of dishwasher-dulled teaspoons.
(3) Most older and some repaired
hollow-handled knives are filled with pitch. This low-melting cement
will expand with heat, possibly forcing open a thin solder seam, or
exploding the knife blade out of the handle.
(4) Silver that touches stainless
in the dishwasher can create a chemical reaction, producing black
spots or pitting on the stainless and possibly requiring the silver
to be professionally refinished.
Sterling, like a fine automobile,
must be handled with tender loving care. You certainly wouldn't drive
your Rolls Royce through a car wash, would you?
Do-it-Yourself
Silverplating ©
You may have seen videos and ads
from makers of do-it-yourself silverplating products. These solutions
are wiped on or made for dipping base metal. Though they look
tempting when thinking about replating a piece, stay away from them.
After a few polishings the newly-applied fine silver will wear away.
(The thickness of these deposits are measured in millionths as
opposed to thousands for true electroplating.) And if you're a dealer
attempting to hide the base metal, the buyer may be upset if that
layer polishes off where surrounding areas of original plating doesn't.
Though more expensive than
purchasing these products, true electroplating deposits a far
thicker, glossier, and more durable layer of fine silver that will
last for generations when properly cared for.
Metal
Toxicity on Plated Objects ©
There are three metals to be
aware of when eating, drinking, or dispensing from a silverplated
object. The easiest method for determining if plating has been
removed is to hold a piece of glossy white paper next to the piece;
you should see a color difference.
Nickel Silver
Most silverplated flatware has a
nickel silver base metal for hardness quality. (Nickel silver
actually contains no silver!) If you have a nickel alergy and see
this metal, discontinue use and have it replated.
Lead
Plated vessels you drink from are
sometimes made from an alloy called white metal. This material will
contain lead with the addition of one or more of the following
metals: antimony, tin, cadmium, bismuth, and zinc. The alloy, when
exposed, is toxic and can leach into liquids, especially those that
are acidic. If you see this gray metal inside a plated coffeepot,
teapot, or other vessel, discontinue use and have the piece replated
or repurpose it. If you're
unsure, send me an image
of the manufacturers stamp and the affected area.
Copper
There's a reason the interiors of
copper cookware are coated with tin: it protects you from copper
exposure. If you see this metal in a vessel you drink from, have the
exposed metal resilvered. If your copper pans require retinning,
contact East Coast Tinning.
Regarding Pewter
There are two types of pewter:
leaded and lead-free. Old pewter is gray in appearance and contains
lead and tin as a hardener. Lead-free pewter appears silver in color
and is made-up of at least 90% tin, with the remainder antimony,
copper, and sometimes bismuth. Leaded pewter must never be used with
food or drink. If you're unsure if the object contains lead, send
me an image of the piece.
Solid silver alloys and intact
silverplate have actual health benefits! Click this
link to find out more.
Silver
Storage & Display ©
Your primary
consideration should be to keep silver objects clean and free of dust
and surface grime. In addition, the following guidelines will help to
preserve your silver's finish while it is on display or in storage.
Some storage
materials should be avoided. Wrapping in newspaper or binding in
rubber bands can cause deep discoloration that may have to be
professionally removed. Never use plastic wrap as it will bond to
silver over time, requiring solvents for removal. Finally,
non-archival corrugated cardboard boxes may contain acids and sulfur
that aggressively tarnish silver.
If your flatware
resides in a kitchen or dining room drawer, make sure it's covered
with sulfur-absorbing flannel as the pollutants will be captured
before hitting the silver.
If a silver piece
to be stored is already tarnished, even if it is heavily blackened,
it need not be polished before storing: doing so will only reveal
fresh sterling or fine silver electroplate to be exposed to the
elements. The formation of tarnish diminishes over time as there is
less fresh silver available for hydrogen sulfide to react with.
Storage (Good):
Tissue with polyethylene bag
Before storing,
wrap each piece in buffered tissue paper or Softwrap tissue; both are
acid-free with a neutral pH. Place it in a polyethylene bag such as a
Ziploc, toss in a 3M or Intercept Anti-Tarnish Strip
(Intercept is preferred as it not only absorbs sulfur, it also
neutralizes tarnish-producing gases), remove as much air as possible,
then seal the bag. You can also use this method if using an untreated
flannel bag or flatware roll.
Storage (Better):
Untreated flannel with polyethylene bag
Put the object in
an untreated flannel bag or flatware roll. Place it in a polyethylene
bag such as a Ziploc, toss in a 3M or Intercept
Anti-Tarnish Strip between the polyethylene and flannel, remove
as much air as possible, then seal the bag. Intercept is preferred as
it not only absorbs sulfur, it also neutralizes tarnish-producing
gases. Both strips attract sulfur, thereby preventing much of it from
being attached to the piece being stored.
Storage (Best):
Sulfur-absorbing flannel with polyethylene bag
Why? Because
treated flannel will guard against tarnish-producing gases from
reaching the silver inside. Put the object in a sulfur-absorbing
flannel bag or flatware roll made of Kenized SilverShield impregnated
with microscopic particles of zinc, or Pacific
Silvercloth impregnated with silver (preferred for its
longevity). Pacific Silvercloth will stay effective for approximately
20 years outside of a polyethylene bag before it becomes saturated
with sulfur. Place the flannel-cover silver bag it in a polyethylene
bag such as a Ziploc, toss in an Intercept
Anti-Tarnish Strip between the polyethylene and flannel, remove
as much air as possible, then seal the bag. This will create an
additional barrier against tarnish-producing gases and greatly extend
the life of the flannel.
Display Cases
Certain paints,
oils, and fabrics within the case can accelerate the formation of
tarnish. Therefore, if the case or cabinet is made of wood, the
interior surface should be sealed, preferably with lacquer or
water-based polyurethane. If latex paint is used, allow it to dry for
at least four months. See the dramatic difference when silver is not
exposed to tarnish-causing particulate here.
Install an Intercept Portable Filtration Unit or Foam Pad to absorb
ta absorb and neutralize tarnish-producing gases.
Lacquers
& Waxes ©
Lacquers
Lacquering silver
and silverplate is generally not recommended for a number of reasons:
1. The individual may not properly prepare the object's surface
to accept the lacquer. 2. It's very difficult to obtain a uniform
coating, even when applied by a professional. 3. If the coating is
not applied well, it may have streaks and small holes, allowing
tarnish to form. 4. Lacquer will eventually yellow and crack,
allowing tarnish to form within the fissures and eventually under the
protective coating. Strong solvents must then be used to remove the
lacquer and the piece refinished. Take a look at these
pieces that were once lacquered by the traditional spray method.
In the case of
lacquering silver for museum display, Agateen lacquer #27 was found
to be the most successful coating as tested by the Winterthur Museum
conservation department. It is an incredibly time-consuming, toxic
process and must be done in a controlled environment.
Renaissance Wax for Metal
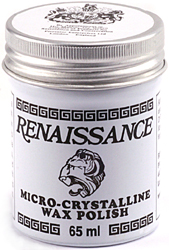
Because of the
above issues, Renaissance wax – an archival micro-crystalline
product – is a better choice. Renaissance will not yellow or
crack and will last for years if handled properly. When applying
Renaissance, do so in small areas at a time (no larger than a 3"
square) and in a well-venitlated area. Buff with a soft cotton cloth,
cotton ball, or makeup pad immediately. Overlap each area to insure
the entire surface gets coated. Renaissance is not as durable as
lacquer, so the object should be handled with heavyweight
cotton inspection gloves as acid from fingers may
eventually remove it. Since dust can be acidic and eventually wear
through the wax, placing your silver in a closed display will help
insure that particulate will not fall on the object's surface. If
the object resides outside a display case, every few months
lightly spray it with distilled water then gently wipe with a Selvyt
cloth or soft cotton cloth. This will keep the wax or silver polish
with tarnish protectant from breaking down prematurely. Renaissance
should not be used on flatware or other surfaces that will be used to
eat or drink from. It can of course be used on the exteriors of
coffeepots, creamers, and the like.
Meguiar's
Quik Wax
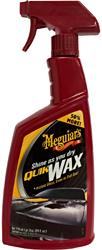
Another tested and
proven long-term tarnish protectant is non-toxic Meguiar's
Quik Wax. This auto wax is sprayed on, then
buffed with a cotton cloth. Though non-toxic, Meguiar's should not be
used on flatware or other surfaces that will be used to eat or drink
from. It can of course be used on the exteriors of sterling and
plated coffeepots, creamers, and the like. Like Renaissance Wax, it's
also effective on brass, bronze, copper, wrought iron, and steel.
Meguiar's can be removed with hand sanitizer (remove any
resudue with Better Life Natural Glass Cleaner). At the first signs
of tarnish, try removing it with Isopropyl alcohol then recoat with
the wax. If the object resides outside a display case,
every few months lightly spray it with distilled water then
gently wipe with a Selvyt cloth or soft cotton cloth. This will keep
the wax or silver polish with tarnish protectant from breaking down
prematurely. I prefer Meguiar's over Renaissance because it's 1.
non-toxic, 2. easier to apply and buff, 3. less expensive. Meguiar's
can be found in most auto supply stores.
Staples Crystal
Clear Wax for Porous Attachments
It's critical to
retard rot and drying out of porous attachments such as ivory
insulators, wooden handles, wooden bases on wine bottle coasters,
etc. In a well-ventilated area apply a very tin coating of clear
carnauba wax (I like Staples Crystal Clear Wax) with
a cotton towel or soft sable-type brush. After no more then one
minute, use a paper or cotton towel to buff the surface until hard to
the touch. Repeat after at least three hours of drying with a
second then third coat. The wax should be fully cured within 24
hours; by that time the solvent will have evaporated and the smell
dissipated. I also use Staples to protect my steel tools from rusting.
Atmosphere
Anti-Tarnish Products ©

1.11.2021:
3M Anti-Tarnish Strips have been discontinued.
3M Anti-Tarnish Strips can be
used to absorb tarnish-producing gases. The strips are made from a
45-lb. paper containing activated charcoal. They guard against
corrosion, tarnish, and discoloration by absorbing airborne
pollutants. These strips can also be used to protect objects
containing copper, brass, solder, gold, and tin. 3M strips absorb on
both sides.
Intercept Anti-Tarnish Strips
consist of a polymer matrix with copper bound in its structure. The
effective surface area of copper available for reactions is twice the
size of the polymer strip. The chemical reactions that take place
with Intercept and corrosive gases permanently convert them into
non-reactive compounds in the polymer and purify the enclosed
environment. Intercept creates a neutralized atmosphere which
protects all materials enclosed with it against corrosion and aging.
Moisture that migrates through the packaging material will also be
cleaned of corrosive elements. Intercept reacts with corrosive gases
in less than an hour. The strips, which protect on both sides, should
be placed near the objects to be protected.
Each 3M and Intercept
2"x7" strip will protect an area up to 424 cubic inches
(.25 cubic feet), the approximate size of a flatware chest.
Protection time depends on the nature and permeability of the storage
container and on the pollution level of the surrounding atmosphere.
The following guidelines apply to an average atmosphere: loosely
sealed container (e.g., cardboard box, china cabinet, or flatware
chest): 6 months; moderately sealed container (e.g., lightweight
polyethylene bag): 12 months; and tightly sealed container (e.g.,
low-permeability polyethylene bag): up to 24 months. The strips
should be replaced in a timely fashion because once they are fully
saturated with pollutants, the strips will become inactive.
Though
both of these products work well, I recommend the Intercept product
because 1. They absorb, neutralize, and prevent the gases from
reacting with the silver. 2. It won't eventually out-gas like the 3M
strips, 3. They're not as abrasive as the 3M Strips if your silver
should rub against it. 4. The strips eventually turn balck indicating
they need to be replaced. Intercept claims their strips are
non-abrasive, but any plastic that is rubbed against silver will
leave very fine lines which will be most evident on highly polished
objects. Additional information about Intercept strpis can be found here.
Intercept Foam Pads
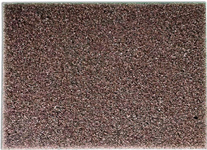
If you're looking to fend off
tarnish in larger areas than what the above strips provide, try this
product. Because of its woven properties which increase its surface
area, each pad will protect silver and other metals in an enclosed
cabinet up to 51840 cubic inches (30 cubic feet). The color will turn
from copper to dark gray when it's time to replace (approximately 12 months).
Active
Filtration
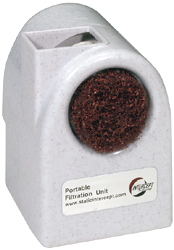
Here's a new
addition to your silver care arsenal. It's Intercept's Portable
Filtration Unit, a small battery-operated device that uses a
non-woven copper filter that absorbs and neutralizes atmospheric
pollution (including ozone, nitrous groups, sulfur compounds,
chlorine compounds, gaseous acetic acid, and more) in silver
cabinets. The passive cleaning and active air filtration within those
cabinets will leave a pristine environment and your silver free of
tarnish. If your silver resides in a humid environment, you may also
want to use silica gel to absorb any moisture. The filter does not
outgas, meaning nothing will coat the items being protected. Cabinets
need not be 100% sealed for the unit to do its job. It will filter
one full air exchange per hour per cubic meter of display
continuously for 60-90 days depending on how polluted the interior
environment is. When the fully saturated copper filter turns dark
gray it must be changed. The two D batteries (not included) must be
changed once every 60 days (mark your calendar). You may want to look
into purchasing rechargeable batteries (the
environmentally-responsible alternative). Additional information can
be found here.
Additional Intercept products can
be found here.
Warning! Though camphor
has been used as a tarnish absorber for many years, it is considered
a poisonous substance.*
* References:
NIH article on camphor poisoning: http://www.ncbi.nlm.nih.gov/pubmed/16809137
Silica
Gel (Humidity Control) ©
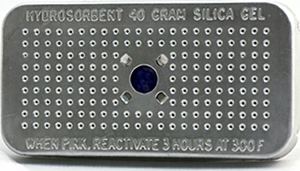
Since World War II, silica gel
has been the drying agent of choice by government and industry. It is
safe to use with even the most sensitive materials, including food
and medicine—it’s what is contained in those tiny packets
enclosed in pill bottles and shoe boxes to prevent moisture. It
prevents tarnish- and corrosion-causing condensation within enclosed
areas, such as flatware drawers and china cabinets. Such areas should
be made as vapor-proof as possible.
Despite its name, silica gel is
not a gel, but is in the form of chemically inert man-made granules
containing thousands of tiny crevices that “drink up”
excess humidity from the air by surface adsorption. A good choice of
product is a canister containing silica gel that turns from blue to
pink when saturated with moisture. Reactivate the gel by drying the
canister in a conventional oven. The reactivation process can be
repeated indefinitely for a lifetime of protection.
Protecting
Carbon Steel Components From Rusting ©
Do you own flatware containing
carbon steel components (blades and fork tines)? This is how you can
keep those components from rusting: After dinner, hand wash the
knives in warm water, then dry immediately. Apply a very thin layer
of Burt's
Bees Lip Balm and wipe with a paper towel until there is no
residue left behind. This will keep the blades from rusting. Since
this product is non-toxic, you won't have to wash them prior to use.
• • •
Credits
A large part of the information
in the sections on Chemical Dips and Silver Display & Storage
was obtained from articles supplied by the Canadian Conservation
Institute, Department of Canadian Heritage, 1030 Innes Rd., Ottawa,
Ontario, Canada K1A OM5, 613/998-3721; Fax: 613/998-4721. Jeffrey
Herman supplied additional information on these topics.
Referenced Articles
"Silver-Care and Tarnish Removal,"
CCI Notes No. 9/7 (Ottawa: Canadian Conservation Institute,
1993). This article is not technical and is intended for the
general public.
"Historical Silver:
Storage, Display and Tarnish Removal" by Lyndsie S. Selwyn,
Journal of the International Institute for Conservation—Canadian
Group, volume 15, 1990, pp. 12-22.
"Evaluation of
Silver—Cleaning Products" by Lyndsie S. Selwyn and
Charles G. Costain, Journal of the International Institute for
Conservation—Canadian Group, volume 16, 1991, pp. 3-16.
Resources
for Silver Care Products ( = Preferred)
• Silver
Polishes
Blitz
Silver Shine Polish
Blitz Manufacturing Company, Inc.
/ website
263 America Place
Jeffersonville, IN 47130
812/284-2548
|
 |
Herman's
Simply Clean™ Collectors Silver Polish / website
PO Box 786
West Warwick, RI 02893
401/461-6840 |
* Blitz Silver Shine Polish is a
great all-around silver polish because it's among the mildest, it
contains a tarnish protectant, and is more versatile than other
polishes in its class. It also leaves silver glossy. The Herman's
Simply Clean is another polish in the Least
Abrasive category. The difference in these polishes is that the
Herman's removes tarnish without making silver look too bright and
leaves no residue, meaning there's no tarnish protectant left on the
surface. This is a concern for some people who don't want anything
remaining on their silver. I personally prefer using Herman's on
pieces that come in contact with food (flatware) or liquids (baby
cups, mugs, flagons, and the like). You can certainly use Herman's on
the interior of a teapot, for example, and the Blitz on the exterior
to retard tarnish. Keep in mind that both products are non-toxic and earth-friendly.
3M Tarni-Shield™ Silver Polish
Marsha Whitney / website
625 Hayward Ave., North
Oakdale, MN 55128
800/597-0227
Twinkle® Silver Polish
S.C. Johnson Wax / website
Racine, WI 53405
800/558-5252
Wright's® Silver Cream
My Brands / website
395 Summit Point Dr., Suite 1
Henrietta, NY 14467
888/281-6400
* Also found in
most hardware and grocery stores
• Silver
Cleaners
(removes grime and light tarnish)
Better
Life Natural Glass Cleaner
Better Life / website
PO Box 15053
Saint Louis, MO 63110
877/256-4767
* Also found in
most Target and Whole Foods stores
Better
Life Natural Dish Soap
Better Life / website
PO Box 15053
Saint Louis, MO 63110
877/256-4767
* Also found in
most Target and Whole Foods stores
Hand Sanitizer - Aloe-Free
* Found in most stores
• Nitrile
Gloves (heavyweight and disposable)
Harbor Freight / website
800/444-3353
* Found in most
hardware and medical supply stores
• Heavyweight
Cotton Inspection Gloves
Gallaway Safety and Supply / website
2559 State Route 88, #B
Finleyville, PA 15332
724/239-3999, Fax: 724/239-4999
•
Brushes
Tampico (very soft)
Justman Brush Co.
/ website
5401 F St.
Omaha, NE 68117
402/451-4420
Natural Boar
Bristle (stiff)
* Found in most
hardware stores
Horsehair (stiffest)
* Found in most
hardware stores
• Selvyt™
Cloths
The Contenti Company
/ website
515 Narragansett
Park Dr.
Pawtucket, RI 02861
401/305-3000, Fax: 401/305-3005
• Intercept
Anti-Tarnish Strips & Foam Pads
Intercept Silver & Jewelry
Care/ website
8500 North Mopac Expressway
Austin, Texas 78759
888/668-7674, 512/761-3388
• Silica
Gel
Hydrosorbent Dehumidifiers / website
* eBay
PO Box 437
Ashley Falls, MA 01222
800/448-7903, Fax: 413/229-8743
• Buffered
(Acid-Free) Tissue Paper
Staples / website
• Softwrap,
Acid-Free Tissue
(for large silver collections)
Judd Paper Co. / website
55 Pawtucket Ave.
East Providence, RI 02916
800/546-2898, 401/490-4429, Fax: 401/490-4378
• Protective
Wax
Meguiar's Quik Wax / website,
SDS
Meguiar's
17991 Mitchell South
Irvine, CA 92614
800/347-5700
* Found in most
auto supply stores
Renaissance Wax
Cutlery Specialties / website,
SDS
6819 S.E. Sleepy Hollow Ln.
Stuart, FL 34997
772/219-0436
Staples Crystal Clear Wax / website,
SDS
PO Box 956
Merrimack, NH 03054
800/682-0034, 603/889-8600
• Intercept
Filtration Unit
Intercept Silver & Jewelry
Care / website
8500 North Mopac Expressway
Austin, Texas 78759
888/668-7674, 512/761-3388
•
Custom Flatware and Holloware Chests
Al Ladd Fine Edge Woodworking / website
266 Shelburne Line Rd.
Colrain, MA 01340
413/624-3048
• Custom
Drawer Inserts,
Relining, Flatware Displays
Lloyds of Lancaster County / website
405 Maxwell Dr.
Quarryville, PA 17566
717/786-4254, Fax: 717/786-8636
SilverGuard / website
321 Kissing Oak Dr.
Austin, TX 78748
877/206-5296, 512/326-9777
Sterling Buffet / website
PO Box 286
Ontario, Ohio 44862
800/537-5783, 419/529-0505
• Flannel
Holloware & Flatware Bags, and Yardage
Kinley Covers (Kenized Cloth) / website
616 Union St.
Weymouth, MA 02190
781/803-7216
(This is a Web-based business)
* Yardage also
found at Jo-Ann craft & fabric stores
SilverGuard
(Pacific Silvercloth) / website
321 Kissing Oak Dr.
Austin, TX 78748
877/206-5296, 512/326-9777
• Jewelry
& Silverware Safes
Casoro Jewelry Safes / website
1415 East McFadden Ave. Ste. L
Santa Ana, CA 92705
800/538-0600, 714/550-4123
•
Retinning
East Coast Tinning / website
5 Division St. Bldg. E4
East Greenwich, RI 02818
401/965-4569
• Lacquer
Stripper (thick consistancy &
safer to use)
Smart-Strip
Dumond Chemicals, Inc. / website
83 General Warren Blvd., Suite 190
Malvern, PA 19355 |


